How to Prepare for Your Photography Tour
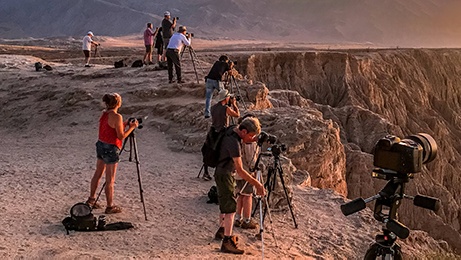
Thank you so much for being so interested in participating in one of our travel photography tours! We strive to have our tour be informative, challenging, and fun. And, while we’re busy working to provide you with an exceptional experience, we also need you to prepare so that we can make the most of our time together. This includes being ready for the tour’s physical demands, being comfortable with operating your camera, and having all necessary camera gear and clothing. If you ever need assistance getting ready for a tour, don’t hesitate to contact us.
General Preparation for Your Tour
Fitness
- The fitness level needed for our tours varies significantly, e.g., the altitude, terrain, and distances hiked can range from very easy to very challenging.
- It’s crucial that you be honest with yourself and us about your current physical abilities and that you train, if/when necessary, to prepare for the tour. While most of our travel photography tours are generally limited to easy-to-moderate hikes on fairly even terrain with little altitude change, other tours like our Grand Canyon River Rafting Expedition involve more strenuous hiking on uneven and/or steeper terrain.
- We are available for any questions you may have – and we will do our best to help you prepare, but ultimately it will be your responsibility to ensure that you are up to the challenges of a given tour.
Know How to Operate Your Camera
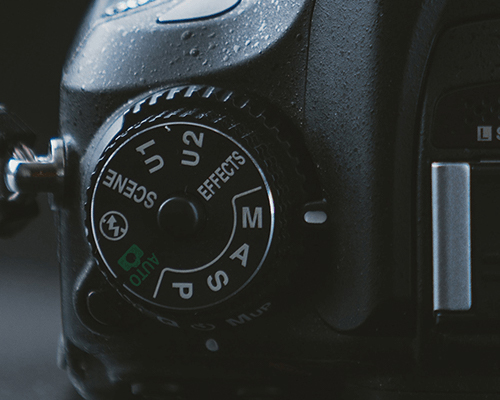
Time spent struggling with camera settings in the field is time lost – it’s a sure-fire way to miss critical shots, and you won’t be focused on improving your photography if you’re preoccupied with trying to figure out camera settings. We’ll be using most if not all of these skills, so spend some time getting used to your camera(s) and using different camera settings. You should be able to:
- Select the aperture, shutter speed, and ISO values in manual mode and use these dials fluently.
- Be able to use Aperture Priority and Shutter Priority modes and also adjust exposure compensation.
- Change the number of focus points from multipoint to single point and know how to move it around the viewfinder and live view.
- Change the focus method from single shot to continuous and from autofocus to manual focus.
- If the camera offers one, display the live view histogram (if the camera has one) and/or exposure metering in live view.
- Display the electronic level/virtual horizon and gridlines in live view.
- Display the RGB histogram in image playback.
- For mirrorless cameras, turn on focus peaking.
- Find and set Auto ISO settings and options.
- Set a 2, 5, or 10-second self-timer. This is very useful to reduce camera shake if you don’t have a remote trigger.
- Enable auto-bracketing for 3, 5, or 7 exposures, with increments of 1–2 stops.
- For DSLR shooters, activate the live view and easily zoom in for critical focus. If you only use live view, then also make sure you’re comfortable with using the viewfinder.
- Be comfortable enough with these settings that you can do all of them in the dark. We often shoot in the dark!
Have Your Gear Organized and Packed
- Make sure that all of your laptop operating system software is updated.
- Update Lightroom Classic and Adobe Photoshop. Make sure you log out of Adobe and log back in before leaving so that your versions are suitable for offline use for 30 days. Do the same with any other software you use for processing.
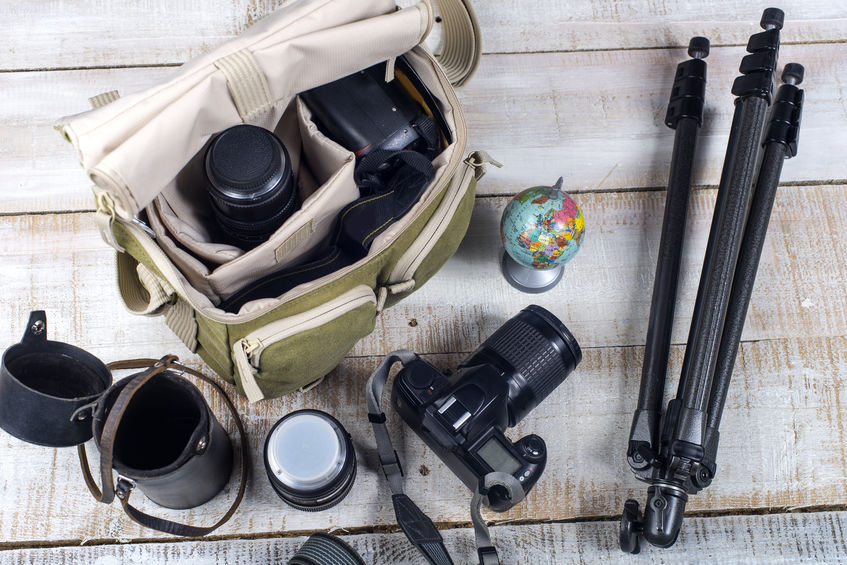
- Pack your gear so that your go-to lens is handy and ready to go. Consider storing that lens on the camera body.
- Make sure your lenses and sensors are clean. If you are a Canon/Nikon professional services member, consider getting a maintenance/cleaning check of all your equipment before your trip.
- Check the recommended gear list for your tour, talk to your pro, and ask questions so that you don’t over or under pack.
- Double-check that you have all cords, adapters, and other accessories you’ll need during the tour. Consider bringing a small travel power strip.
- Pack all of your lithium batteries in your carry-on bag so that you are complying with flight regulations. Consider using Lipo Safe Bags.
- Make sure to set the date and time of your cameras to local time.
- Set your camera so it will only fire with a memory card in the slot. You never know when you might forget to put the card back in the camera, and the last thing you want is to find out later that all those “shots” you took weren’t saved.
- Pack in soft-sided luggage. It packs into our vehicles better than hard plastic luggage.
Clothing and Weather Gear
- While you don’t want to overpack, it’s always good to assume that it will be colder, windier, and wetter than you expect.
- Are you wondering if you should bring your rain pants? Bring them.
- Extra set of gloves in case the first gets wet? Great idea. Maybe your socks get soaked in a stream or the surf of the ocean.
- Another layer? Yes. Be prepared for the unexpected.
- Make sure your boots are properly fitted and broken in. Waterproof boots are best. For some tours, a pair of shoes or sandals will be fine, too.
- Ask us if you have any questions about your footwear.
Essential Gear Required for Any/Every Tour
- Sturdy Tripod – strong and light.
- Ballhead and Camera/Lens Plates – for ballheads, we love the models from Really Right Stuff, as well as the Arca-Swiss p0 Monoball. You’ll need ballhead plates for all of your various cameras and telephoto lenses (with collars), as well as the tools needed to install and remove them. We’re huge fans of Really Right Stuff L-brackets and plates.
- Camera Strap(s) – you can use what comes with your camera, or try something from BlackRapid, PeakDesign, or Cotton Carrier.
- Two Camera Bodies – You’ll have a backup in case of accidental damage or electronic failure.
- Batteries – bring plenty of batteries for your cameras, and chargers as well. If your trip involves locations with limited electric power, you will want to bring a power bank to recharge your batteries.
- Lenses – for most landscape and wildlife tours, a wide-angle zoom (16-35, 17-35, 17-40), a general-purpose zoom lense (like 24-70 or 24-105), and a medium telephoto zoom (like 70-200) are perfect. For some wildlife tours, you’ll want something longer—at least 300mm, and likely 400mm or 500mm. Canon, Sony, and Fuji all make 100-400mm lenses that are great for wildlife. It’s quite fine to use the Sigma or Tamron 150-600 lens as well. Don’t own any of this glass? No worries—BorrowLenses.com to the rescue!
- Memory Cards – have plenty of these! Don’t forget a card reader!
- Laptop – we will be using Lightroom Classic and Photoshop for post-production (though you are free to use other software programs). Be sure you connect (via the internet) with Lightroom Classic and Photoshop. This will ensure you’ll be able to use them offline on your trip.
- Plug Adapters – you will likely need adapters for your plugs if traveling internationally.
- Lens Cleaning Cloth – dry cloths and wet wipes.
- Camera Rain Cover – inexpensive ones available from Amazon / more permanent ones available at ThinkTank.
- Backpack – bring a comfortable camera backpack for carrying all of your gear.
- Camera Manual – bring the manual for your camera / get the PDF version and store it on your smartphone.
- Boots/Shoes – wear sturdy hiking boots or hiking shoes appropriate for the tour that are broken in – this is not the time for a new pair of shoes.
- Water Bottle – important to have water and to reduce our use of plastics.
Recommended Gear to Bring With
- External Hard Drive or Storage Device – a self-powered device is great when you can’t set up your laptop.
- Power Strip – bring a travel power strip and extension cord.
- Filters – a circular polarizer (for cutting reflections) and a few ND filters (for long exposures) are helpful. For ND filters, bring a 3- or 6-stop, and a 10-stop.
- Wired Remote Trigger – typically needed when using Bulb mode / great for time-lapse.
- Sunscreen, Bug Repellent, Mosquito Head Net – when you need these you need them!
- Wide Brim Hat – helps you to see your camera LCD.
- Headlamp – essential for night photography / must have both red and white lights and be dimmable.
- Rain Jacket, Beanie, Neck Gaiter, Gloves – when you need these you need them!
- Backup ID – keep a copy of your passport, driver’s license, birth certificate, customs passes stored on your smartphone. Bring along some additional print copies just in case.
- Waterproof Boots or Overshoes – when you need these you need them!
- Swimsuit – hot tubs, swimming pools, streams, and lakes.
- Knee Pads – your knees will thank you!
- Sensor Cleaning Supplies – bulb blower, Aeroclipse Fluid.